
Mastering AB Epoxy Resin Ratios: Weight vs. Volume Guide
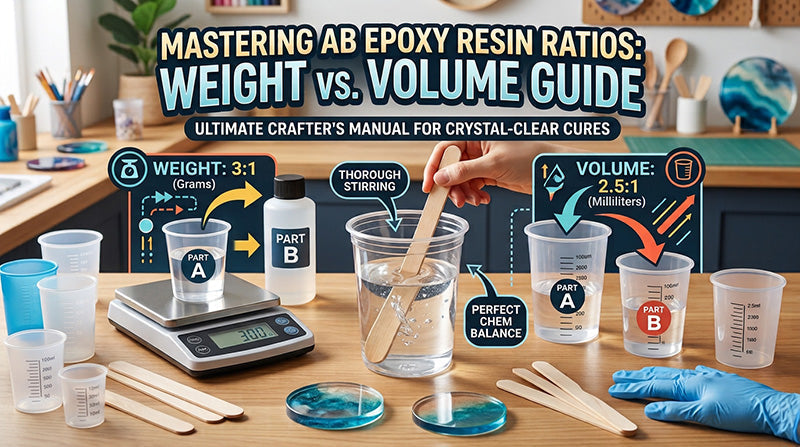

Achieving a glass-like, crystal-clear finish on your resin crafts requires precision from the start. Whether you are casting coasters, preserving dried flowers, or sealing polymer clay miniatures, the outcome depends on getting your two-part AB epoxy resin ratio exact.
Unlike UV resin which cures under light, AB epoxy resin relies on a chemical reaction between Part A (Epoxy Resin) and Part B (Hardener). If the chemical balance is off by even a few grams or milliliters, the resin will fail to cure properly.
Weight vs. Volume: Understanding the Difference
Many beginner crafters assume that a 3:1 ratio means measuring 30 ml of Part A to 10 ml of Part B. However, density matters: Part A resin is noticeably thicker and heavier than Part B hardener.
When you convert weight (grams) to volume (milliliters), the numerical ratio shifts. For standard Malaysia Clay Art AB Clear Resin, use these exact measurements:
| Measurement Method | Mixing Ratio (A : B) | Sample Recipe (Small Batch) | Sample Recipe (Medium Batch) |
| By Weight (Grams) | 3 : 1 | 30g Part A + 10g Part B | 60g Part A + 20g Part B |
| By Volume (Milliliters) | 2.5 : 1 | 25ml Part A + 10ml Part B | 50ml Part A + 20ml Part B |
Which Method Is Better?
-
Measuring by Weight (Recommended): Using a digital kitchen or jeweler's scale measuring in grams (0.1g precision) is the most accurate method. It eliminates meniscus reading errors in measuring cups and ensures repeatable results every time.
-
Measuring by Volume: Graduated silicone or plastic cups work well for larger batches, provided the cup sits on a completely level surface and you read liquid lines at eye level.
Essential Measuring Tools
Having the right tools on hand prevents cross-contamination and inaccurate measurements:
-
Digital Precision Scale: A scale calibrated to 0.1g accuracy is essential when measuring by weight.
-
Graduated Silicone or Paper Cups: Silicone cups allow easy cleanup (cured resin peels right out), while disposable paper cups offer mess-free convenience.
-
Flat-Edged Stir Sticks: Thick wooden popsicles or flat silicone spatulas work better than thin chopsticks or round sticks because they scrape flat surfaces cleanly.
-
Nitrile Gloves & Protective Sheeting: Protect your hands and workspace from sticky uncured resin spills.
Step-by-Step Stirring Technique
Measuring correctly is only half the battle; improper mixing leaves unreacted pockets of resin that cause sticky spots.
-
Tare Your Scale: Place your clean mixing cup on the digital scale and press Tare/Zero.
-
Pour Part A First: Measure the required weight of Part A (e.g., 30g).
-
Add Part B Slowly: Reset/tare the scale or calculate the total target weight (40g total), then pour Part B slowly into Part A. Pouring too quickly can cause sudden self-heating (exotherm).
-
Stir Slowly for 1 to 3 Minutes: Stir steadily in a uniform direction to avoid trapping micro-bubbles. The mixture will initially look cloudy or streaky; keep stirring until it turns 100% crystal clear.
-
Scrape the Walls and Bottom: Periodically scrape the sides and bottom of the cup with your stir stick. Unmixed resin often clings to the cup edges.
-
The Two-Cup Method (Pro Tip): For high-precision projects, transfer the mixed resin into a second clean cup and stir for another 30 seconds. This guarantees no raw, unmixed Part A or B gets poured into your mold.
Why Is My Epoxy Resin Sticky, Soft, or Tacky?
If your cured piece remains bendy, rubbery, or wet to the touch after 24 to 48 hours, one of these common issues is usually responsible:
-
Incorrect AB Ratio: Adding extra hardener (Part B) does not make resin cure faster. Excess hardener remains unreacted, leaving a sticky film. Always stick strictly to 3:1 (g) or 2.5:1 (ml).
-
Under-Mixing: If Part A and Part B are not fully integrated, localized unmixed areas will stay wet inside your mold.
-
High Ambient Humidity or Low Temperature: In tropical climates like Malaysia, air-conditioned rooms below 20°C slow down curing significantly. Optimal curing occurs at ambient temperatures between 25°C and 35°C. Keep liquid moisture and high air humidity away from curing pieces.
-
Over-Adding Liquid Pigments: Adding more than 5% liquid dye relative to total resin volume disrupts the chemical bond, preventing a hard cure. Stick to concentrated mica powders or specialized resin pigments.
By weighing your materials accurately, stirring thoroughly across cup surfaces, and letting your piece cure at room temperature, you will consistently produce rock-hard, bubble-free resin creations.

Leave a comment
Comments will be approved before showing up.
Also in Let's Get Creative


Join Our WhatsApp Channel!
Subscribe now to get the latest updates on sales, promotions, new releases, and FREE tutorials!
**Get an exclusive discount on your first purchase when you join!**